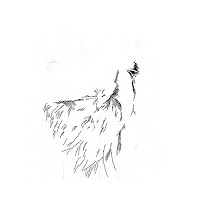
Showing posts with label animal drawing. Show all posts

Wednesday, January 22, 2014

Jallikattu Series

January being the season of farmers in southern part of India, there is celebration for a week. Highlight of the festival season is the Bull Taming (Jallikattu) conducted in various parts of village. Youngsters are lined up not just for the game, but it proves their braveness, ofcourse there are people who jump out of the field. With all these new actions over the internet, why not put them on drawing and here are few of the actions using Charcoal stick as medium.


Tuesday, August 21, 2012

"Kumki" Special - Pencil Drawings Part 2


After posting "Kumki Special - Pencil Drawings Part 1", Kumki fever has never gone down, infact it has increased. I am humming Kumki songs whole day, especially "sollitale....". The craze for the movie has gone up after recieving credits from

  • D.Iman, music diector of Kumki - "nice to meet an artist..beautiful no words" 
  • Vikram Prabu - tweeted my drawings to his friends
  • Santhomer, asst director to Prabu Solomon - commented on part 1

Encouragement from my friends and Kumki team drove me more towards Kumki and I finished part 2 with one more drawing from the prerelease stills. There should be more critics for this drawing, please do share them in comments for me to improve next time.

All the best and Kumki team please dont make us wait long for the movie :)

Wednesday, August 15, 2012

"Kumki" Special - Pencil Drawings Part 1

Kumki, the name itself sounds different and when browsed to know what it really means, I was attracted to it, may be related to elephants ;) last week happened to see Kumki audio release function in Vijay TV and was carried away by the emotional moments, and today Independence Day Special of Kumki songs in Vijay TV again attracted me more towards the film.

Before even the release, the movie has attracted the audience in mass, am sure this movie is going to be great blockbuster than Myna. How can I stop me from drawing the awesome stills release by Kumki team, and here are two of them drawn on Independence Day holiday watching all TV programmes ;)


Even though I could not bring the exact feeling which the stills revealed, I tried my best to bring out the Kumki stills, few more drawings in progress which I will post very soon, before the film release.

Sunday, October 23, 2011

Draw Lion - Step by Step

After a long time, I am posting a step by step approach to draw a Lion. It is NOT my drawing, but one of my friend, who was kind enough to post his 9 hrs step by step approach in drawing the lion. I have posted his comments while the step by step process. It has come out very well. Drawing a Lion is very difficult, that too a male lion is very very difficult because of its mane of large fur around its face. This is to spread my friend's hard work, respecting his talent.

Step 1
Step 1: Sketch the drawing out with pencil. I draw a grid to help me do this, but that's just my preference because I like to get all the proportions just right. I'm focusing on the major markers in the image (e.g. eyes, ears, nose) and the general outline.
Step 2
Step 2: Start with the areas you are most worried about. It's easier to screw up at the start of a drawing rather than the end! The mane was definitely the area I was most worried about. I knew I could do the face, but I'm still gaining experience with longer hair. My strategy for the mane was to draw in some of the major shadow areas first. Try to draw what is behind the hair rather than hair itself. This will make the hair patterns 3 dimensional. I used strokes that matched the texture of the mane - generally long frizzy hairs.
Step 3
Step 3: More time on the mane. I added some basic shading to the hair to start filling in areas. At this point I start to believe that I'll be able to get the mane to work. That's a big relief so next I will try ink in the basic shapes of the face.
Step 4
Step 4: Drawing the eyes always starts to bring pictures alive. it wasn't too hard for this drawing - basically just fill in a few black areas. I almost always using a stippling approach for the eyes. It gives them a glassly look that contrasts well with the long strokes used for hair. I'm usually anxious at this point to pull the whole drawing together so I draw a bit here and a bit there until I see the whole shape.
Step 5
Step 5: This step filled in more of the facial hair. This hair is all very short compared to the mane so of course you use much shorter strokes. I'm not worried about the correct shading yet and am mostly focusing on getting the direction and lengths of the hairs correct. Some of the hair, like the tip of the nose, is so short that I just use dots. This update doesn't look like that much, but it took a while because there was a lot of detail that had to be worked through – location of black whisker spots, subtle hair direction on cheek and forehead, etc.
Step 6
Step 6: The initial texture of the whole drawing is now in place. Next will come more detailed shading.
Step 7
Step 7: Lots of small changes now. I added a lot of darkness to the mane to give it some depth. Plenty of darkening of the face and ear.
Step 8
Step 8: Another pass of darkening. I spend a lot of time now just looking at the picture. I've got a number of tricks that let me view the drawing in different ways: - Squint or blur your eyes. This forces you to focus on the general shading patterns rather than the details of the strokes. - Look at the picture in a dim light. In a bright light you focus on the individual pen strokes rather than the overall image - Look at the picture from across the room. Same as above, when viewing the picture from far away you focus on the big picture rather than individual strokes. I tend to draw for an hour or two and then hang the picture up on a wall. Every time I walk by it I notice something and make a mental note for my next drawing session. - Look for shapes of dark and light. Sometimes you focus too much on drawing the dark parts. This can result in a bunch of shapes that are not in proportion to the overal drawing. Look at the shapes of light areas and try to get them to match the source image to achieve overall balance. A good example in this drawing is the "Y" pattern of dark in the cheek. Look both for the Y shape and also the circle of lighter shading formed under the Y along the jaw line. They both need to be correct for the whole drawing to work. - Look at the picture up side down. This is a good trick to focus in on shapes. When you look at it right side up, you see the image. When you look at it upside down, you only see shapes.
Step 9
Copyrights of this step by step series belongs to Scott Woyak

Friday, July 1, 2011

Animal Series - Great Collection

This time I am with animal drawings. I was inspired to see many details in these drawings.
Note the details of the hairs in each drawing. These are mostly dots or small lines to get that hairy effect.
The artist has used lines in some places and dots in most of the places. see the difference in potraiting the hairs.
I would rather tell it animals drawn using dots