Cattle Fair - Rajasthan


| Step 1: Sketch the drawing out with pencil. I draw a grid to help me do this, but that's just my preference because I like to get all the proportions just right. I'm focusing on the major markers in the image (e.g. eyes, ears, nose) and the general outline. | ||
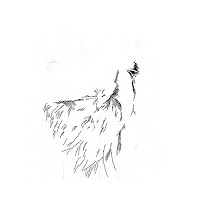
| Step 2: Start with the areas you are most worried about. It's easier to screw up at the start of a drawing rather than the end! The mane was definitely the area I was most worried about. I knew I could do the face, but I'm still gaining experience with longer hair. My strategy for the mane was to draw in some of the major shadow areas first. Try to draw what is behind the hair rather than hair itself. This will make the hair patterns 3 dimensional. I used strokes that matched the texture of the mane - generally long frizzy hairs. | ||
| Step 3: More time on the mane. I added some basic shading to the hair to start filling in areas. At this point I start to believe that I'll be able to get the mane to work. That's a big relief so next I will try ink in the basic shapes of the face. | ||
| Step 4: Drawing the eyes always starts to bring pictures alive. it wasn't too hard for this drawing - basically just fill in a few black areas. I almost always using a stippling approach for the eyes. It gives them a glassly look that contrasts well with the long strokes used for hair. I'm usually anxious at this point to pull the whole drawing together so I draw a bit here and a bit there until I see the whole shape. | ||
| Step 5: This step filled in more of the facial hair. This hair is all very short compared to the mane so of course you use much shorter strokes. I'm not worried about the correct shading yet and am mostly focusing on getting the direction and lengths of the hairs correct. Some of the hair, like the tip of the nose, is so short that I just use dots. This update doesn't look like that much, but it took a while because there was a lot of detail that had to be worked through – location of black whisker spots, subtle hair direction on cheek and forehead, etc. | ||
| Step 6: The initial texture of the whole drawing is now in place. Next will come more detailed shading. | ||
| Step 7: Lots of small changes now. I added a lot of darkness to the mane to give it some depth. Plenty of darkening of the face and ear. | ||
| Step 8: Another pass of darkening. I spend a lot of time now just looking at the picture. I've got a number of tricks that let me view the drawing in different ways: - Squint or blur your eyes. This forces you to focus on the general shading patterns rather than the details of the strokes. - Look at the picture in a dim light. In a bright light you focus on the individual pen strokes rather than the overall image - Look at the picture from across the room. Same as above, when viewing the picture from far away you focus on the big picture rather than individual strokes. I tend to draw for an hour or two and then hang the picture up on a wall. Every time I walk by it I notice something and make a mental note for my next drawing session. - Look for shapes of dark and light. Sometimes you focus too much on drawing the dark parts. This can result in a bunch of shapes that are not in proportion to the overal drawing. Look at the shapes of light areas and try to get them to match the source image to achieve overall balance. A good example in this drawing is the "Y" pattern of dark in the cheek. Look both for the Y shape and also the circle of lighter shading formed under the Y along the jaw line. They both need to be correct for the whole drawing to work. - Look at the picture up side down. This is a good trick to focus in on shapes. When you look at it right side up, you see the image. When you look at it upside down, you only see shapes. | ||
|